Selecting Imagery
When you select imagery, it is added to the viewport. You can select as many images as you like. As you zoom and pan around the map, Rapid Access automatically selects imagery that provides the best coverage of an area. You can leave these images selected, select additional images, or deselect all of the automatic selections.
Selecting Individual Images
Select images from the Imagery panel to add them to the viewport.
Rapid Access automatically selects imagery that provides the best coverage of the area.
Select Imagery. The Imagery panel opens.
(Optional) From the Imagery Catalog drop-down, select the imagery catalog (e.g., online, archive) you want to view.
Do either of the following, depending on whether you are in card view or list view:
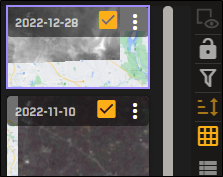
Card View Select the checkbox on the image(s) you want to add to the viewport.

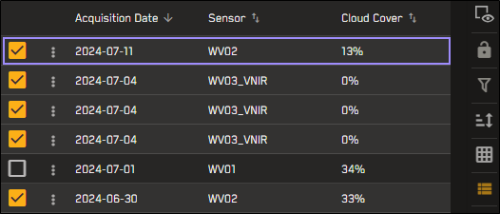
List View Select the checkbox next to the image(s) you want to add to the viewport. You can also select anywhere in the image's row.
Deselecting All Imagery
By default, Rapid Access automatically selects imagery that provides the best coverage of an area. If you want to remove this imagery from the viewport, you can clear the automatic selections from the Imagery panel using the Deselect All option. You can also use this option if you want to quickly clear all of your selections from the Imagery panel at any time.
Select Imagery. The Imagery panel opens.
Select the With Selected menu
 , then select Deselect All.
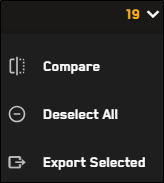
This removes any current selections from the Imagery panel and the viewport.
Deselect All is available if two or more images are selected.
Deselect All applies to the current imagery catalog. If you switch catalogs, Rapid Access makes automatic selections in the new catalog.
More About Selecting Imagery
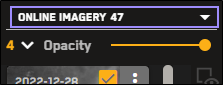
The number of selected images displays at the top of the Imagery panel, next to the Opacity slider.

In this example, there are 11 images selected.
Selecting an image locks the Imagery panel. See Locking and Unlocking the Imagery Panel.